|
The best camera to try the monocle is a simple mechanical SLR with plain matte focusing screen.
With SLR you can use focusing screen to compose picture and adjust focus.
The lens has to be positive meniscus with the focus length you need to picture your subject;
usually in 35-135mm range. The concave side of meniscus has to be pointed to outside, towards the subject.
The aperture should be placed in front of the meniscus (i.e. outside the lens).
The distance between aperture and a front element should be adjusted as approximately 1/10 of focal distance.
[3]
For example, for 130mm it would be around 13mm. One can make the final adjustment of that distance by checking
the size and the shape of coma (coma is a result of spherical aberration, usually seen as luminescence,
“halo” around bright objects of the scene).

You can check my drawing of a simple monocle above.
The focal length measured from the back edge of the meniscus (dotted vertical line).
Fixed size aperture (“Waterhouse stop”) are inserted in the rubber shade.
(The Waterhouse stops named after their inventor. In the early years of photography lenses were often made without adjustable iris. Instead, there was a slot intended for the insertion of interchangeable metal or cardboard plates, each with its own fixed aperture.)
The size of the aperture can be adjusted experimentally, by the picture on ground glass.
For the different subjects different apertures can be used.
One of the monocle’s features is a long travel of the lens when adjusting the focus.
It is hard to use any standard lens as a base for your project because of that reason;
most probably your future lens will not hit the infinity.
Sometimes, if you are lucky, you can use additional thread not intended initially for focus adjustment,
for example zoom lens with long adjustment distance.
It is very common to use bellows or telescope-like construction of the monocle. |
|
1. “Zykkor M.C auto 1:2.8 135mm” as a base for monocle lens
I have several old all-manual Minolta SLRs:
Minolta SRT Super, Minolta SRT 200 and Minolta SRT MCII.
I like the classical design and the feel of Minolta SRT; it is also very rigid, reliable camera, “build to last”.
Used, they are cheap these days. If you interested in Minolta’s SLRs, please check [2]
or “my gear” section of this site.
Used lenses for manual Minolta (“bayonet MD”, Minolta gave them “Rokkor” brandname) are also not so expensive.
If you try to check the prices on used Sigma/Tamron/etc lenses with Minolta MD bayonet you will be surprised how cheap they are.
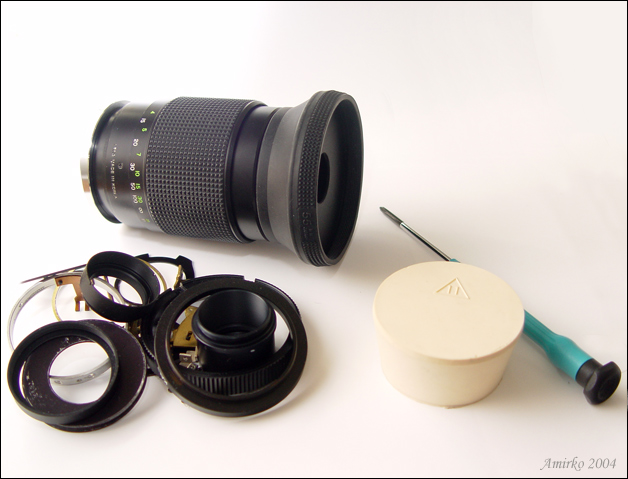
So my choice for the first home made monocle I tried to make back in 2003 was old “Zykkor M.C auto 1:2.8 135mm”, with Minolta MD bayonet.
The lens can be mounted on any manual Minolta camera, including SRT, XE, XK and X700/X570 series. The construction is simple,
disassembling process is very straightforward. You just need the right screw driver (#0) and cone rubber spanner to unscrew the front
element’s washer with “Zykkor” name engraved. The 4 lenses came out, all good quality optical coated glass.
It is also good idea to get rid of internal aperture mechanism. We need just an empty cylinder.
Internal black details were black and matte,
no need for black matte paint (it is possible to have some shining parts inside the lens after the surgery described above; all
of them have to be covered with black matte paint or fabric). First I tried to use a macro +10D filter as a main element;
the shape of this positive meniscus was just right. But the focal distance of the lens (100mm) was too short for the Zykkor’s abilities to
adjust it, so I decided to go with one of its internal elements (second, counting from the outer end of the lens).
I just flipped it over (i.e. concave to outside, prominence to inside) and it snapped in place.
Focal distance of the lens is about 135mm. You can check the focal distance by adjusting the focus on the paper screen using distant
light source and then measure the distance between the screen and the lens.
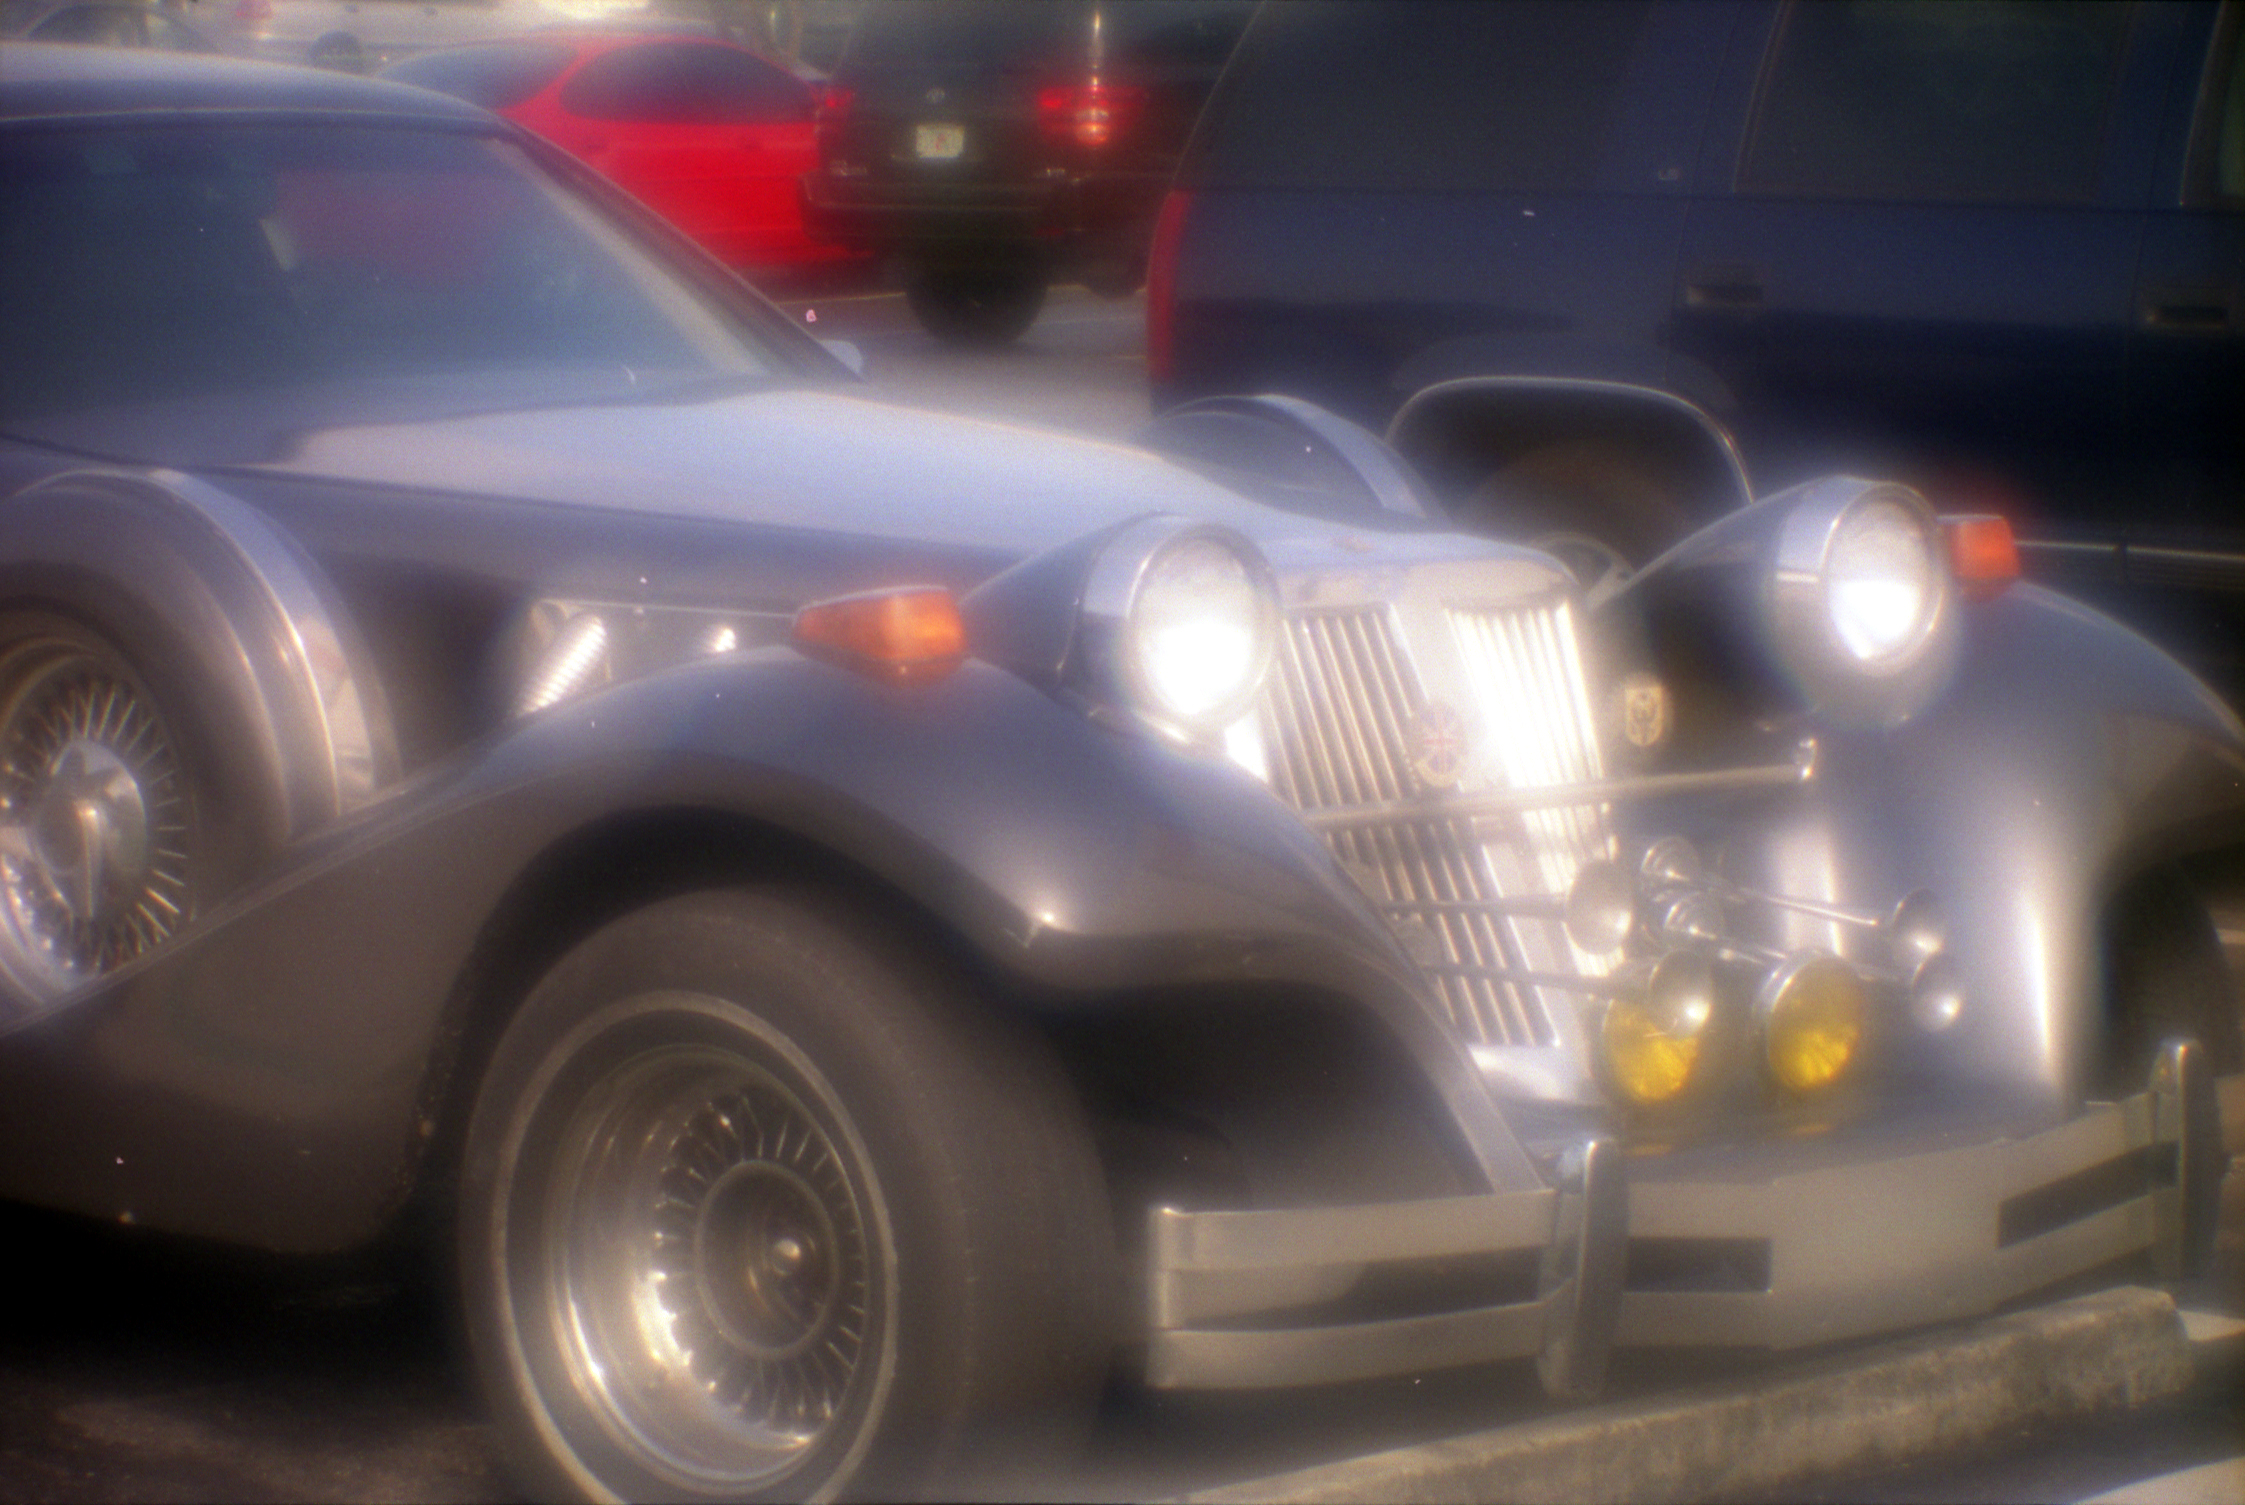
Now let us take a look at the construction of the aperture. I used screw-in rubber shade as a mounting rim.
I made several “Waterhouse stops” disks using black matter plastic (formerly known as a DVD cover).
The distance between the lens and the aperture was about 25mm, a 12 mm more then recommended in
[3]
for that focal distance (135mm/10=13.5mm), but I was pleased with the result from the technological
point of view and decided to try it as is. You can see on the picture below the final result with some
internal extra Zykkor’s parts and tools I used to extract them:
Zykkor has 2 threaded joints, first and the finest one was intended to use for the focus adjustment,
the second is just a joint between front and back parts of the lens. I was lucky to have both; the adjustment happened to be
long enough to reach the infinity.
2. Bellows-based monocle
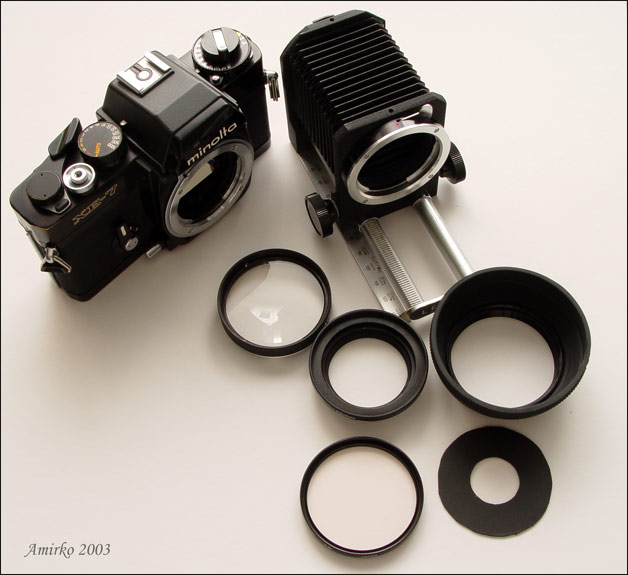
I made this monocle from standard parts; you are not supposed to brake/destroy anything to make it as it was in “Zykkor” case (well, almost).
So, at the starting point we have:
- “Minolta XE-7” SLR (place your favorite manual SLR here),
- “Lentar” macro bellows for Minolta MD (any bellows for your favorite camera can be used),
- Positive meniscus lens with 135mm focal distance (originally unknown brand macro-filter),
- T-adapter as a source of reciprocal MD bayonet part,
- 49мм to 55мм step-up ring (Lentar to macro filter adapter),
- screw-in 55мм rubber shade “Quantaray” for long focus lens (short focus will not fit the bellows),
- transparent UV 55mm filter,
- “Waterhouse stop” aperture made of black matte plastic or cardboard with external diameter to fit internal opening of the UV filter.
Please check the picture:
The work will start from the lens. It has to be flipped in a rim. Use optical spanner to unscrew the retaining ring. I used this spanner:
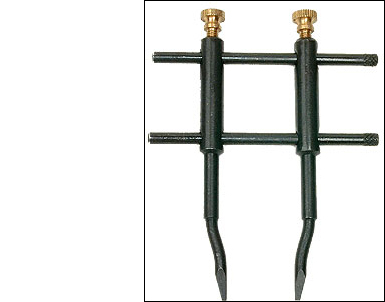
You can buy it at Micro-tools store:
http://www.micro-tools.com.
For retaining rings with slots or dots its reasonably easy to make a custom spanner from sheet of brass or hard aluminum. You can use steel, too, but brass or aluminium easy to work with.
The spanner is simply a “fork” with the tines cut to fit. Such a spanner is better then one pictured above; it has no tendency to slip. A slip can wind up damaging the lens.
A spanner can be made with files and a vice. Since they are fixed in size and rigid they can't slip and scratch the glass.
As soon as you have a right tool, the work is simple: unscrew it, flip it over, put in place, and screw it back…done.
As a next step we will build the universal adapter from MD bayonet to 55mm filter thread.
So, I took the T-adapter. T-adapter is commonly used to connect your camera to a telescope or a microscope.
It is not expensive (I bought mine for $13, shipping included) and you should be able to find one for any type of bayonet.
I unscrewed three tiny screws and took MD part of T-adapter. Then I epoxy 49mm to 55mm step-up ring to that bayonet part.
I used 49 and 55 just because the elements I had was that size, yours may differ.
The ring has to be thoroughly centered before using the glue. I used pair of compasses and cardboard templates to center it:

Take a look at the tiny holes left after T-adapter screws.
If you put the masking tape on the bottom before applying the epoxy, and the epoxy will happen to be liquid enough,
it will help to fix the ring on the adapter.
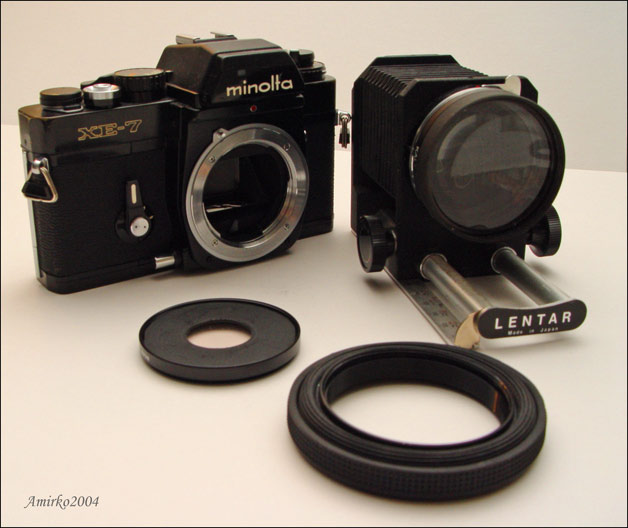
Well, it is ready to go! I assembled the monocle in the sequence: SLR, bellows, T-adapter (modified), lens:
Then – the shade and the filter with “Waterhouse-stop” aperture installed. You can see the result on the picture:
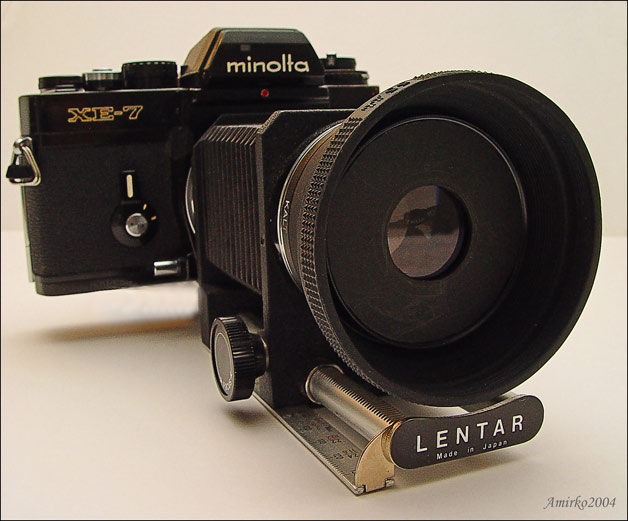
The bellows-based monocle has two major differences from “Zykkor”-like:
first, it can be focused from 1 foot to infinity (Zykkor’s short focusing distance is limited by 6 feet).
Second, you can try different lenses with this construction – just replace the lens!
|
|
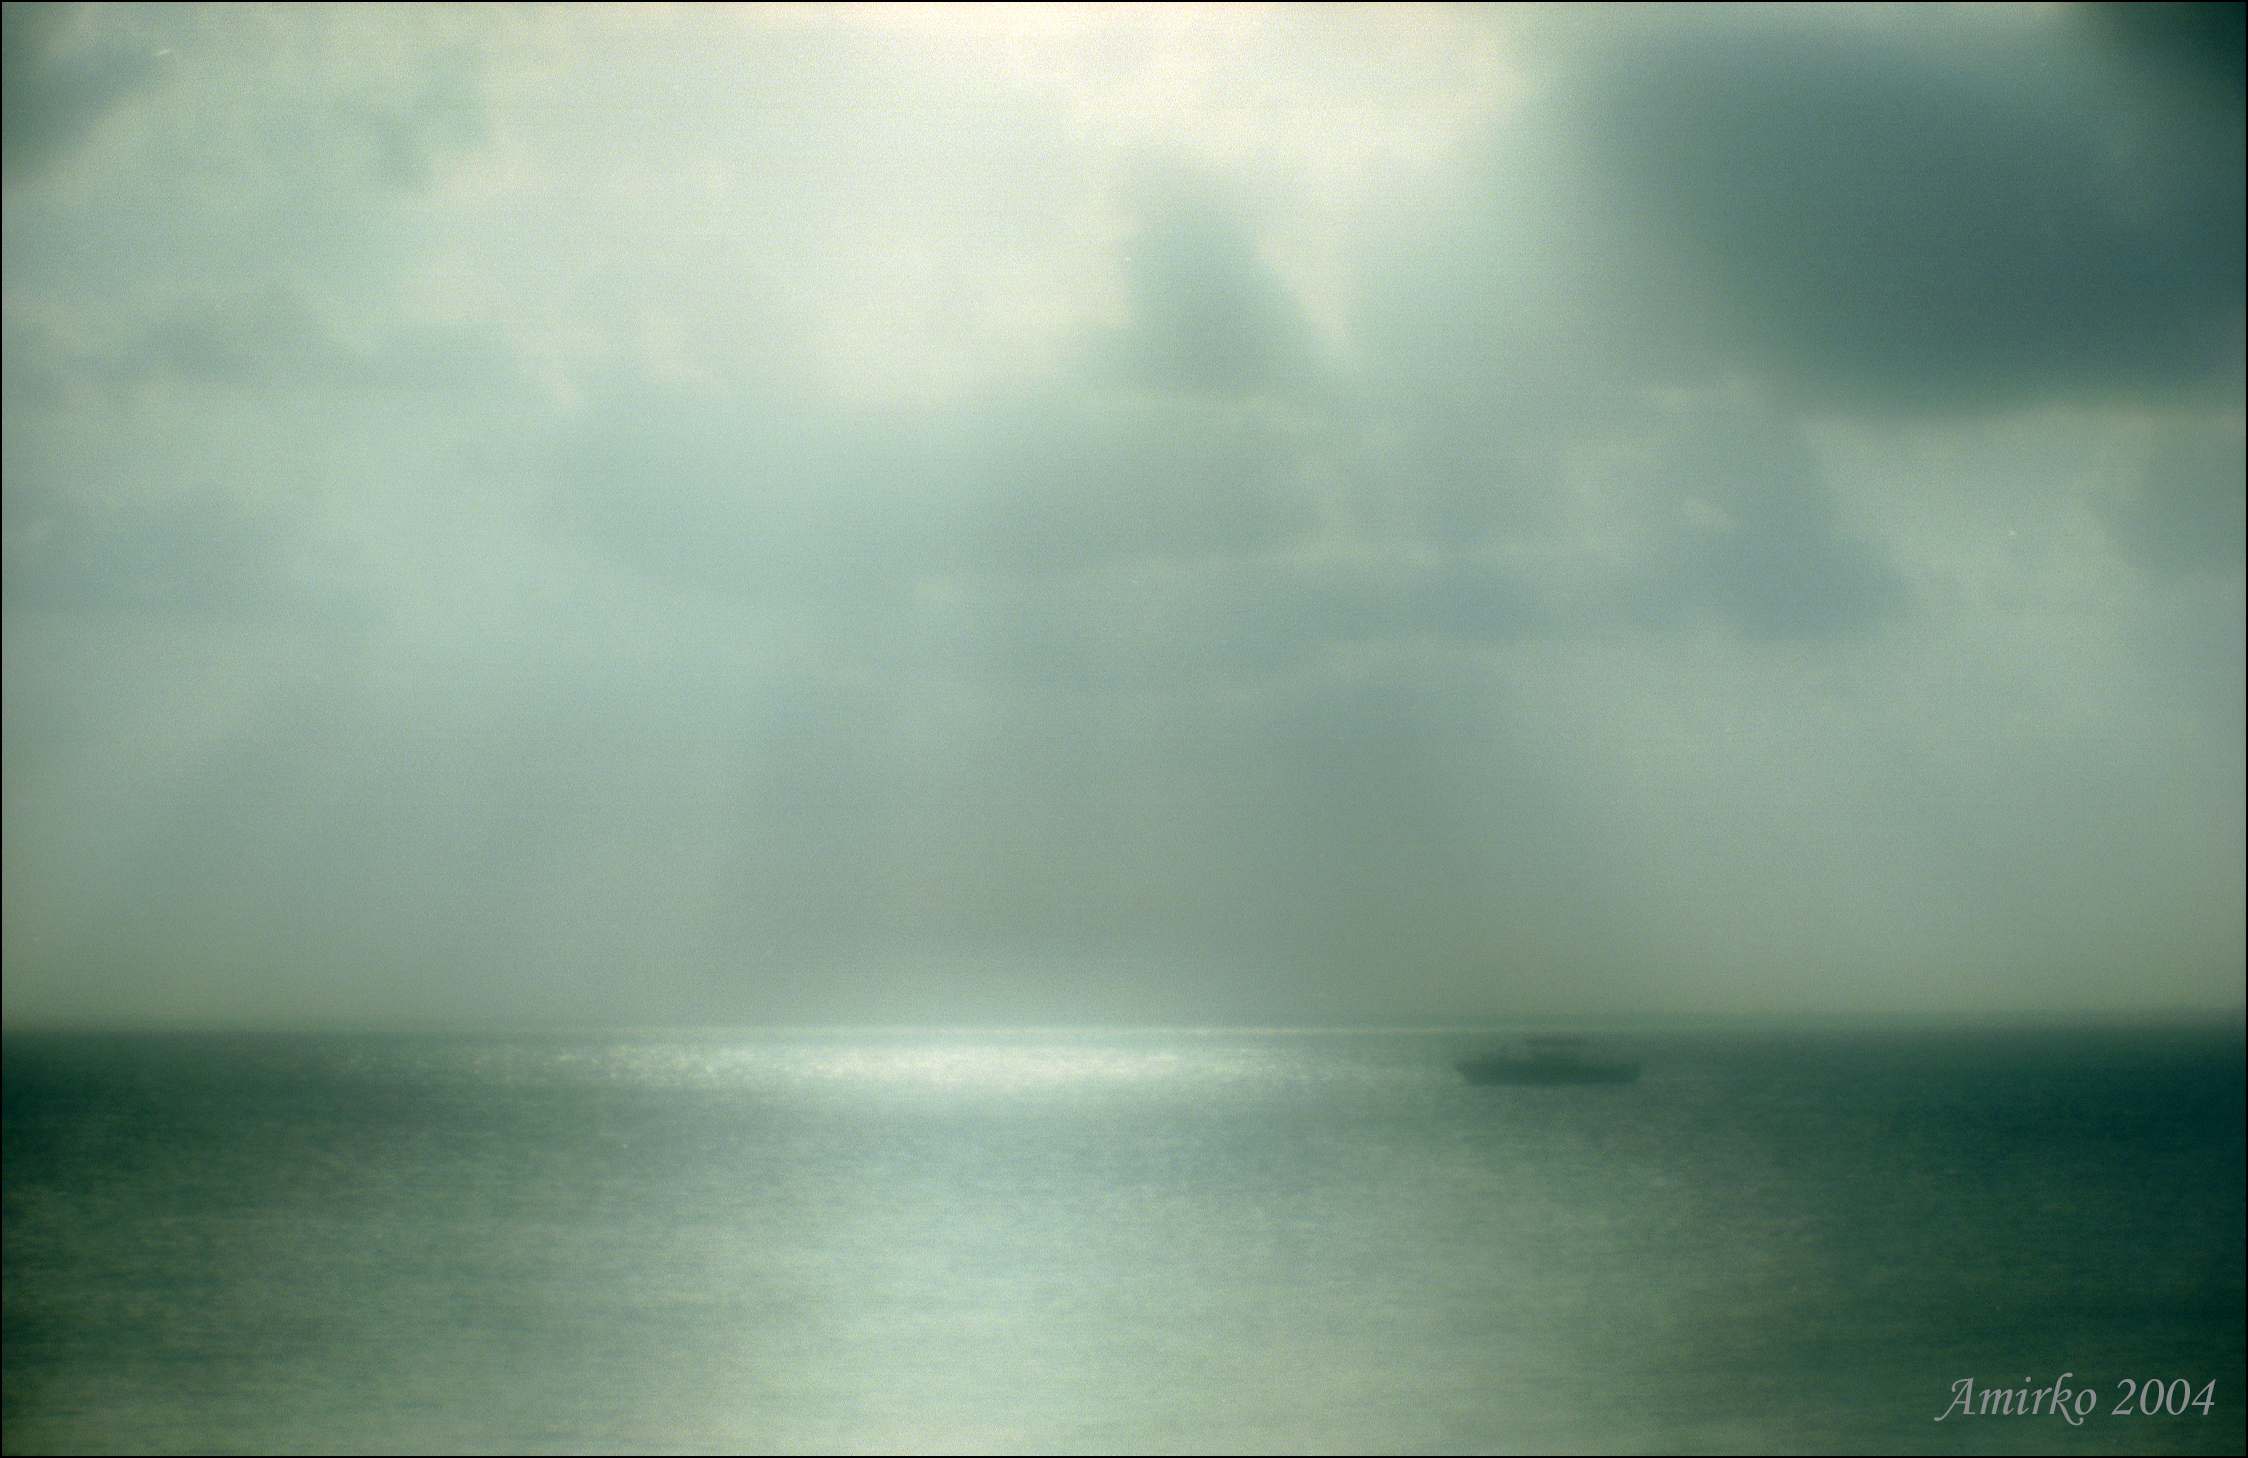
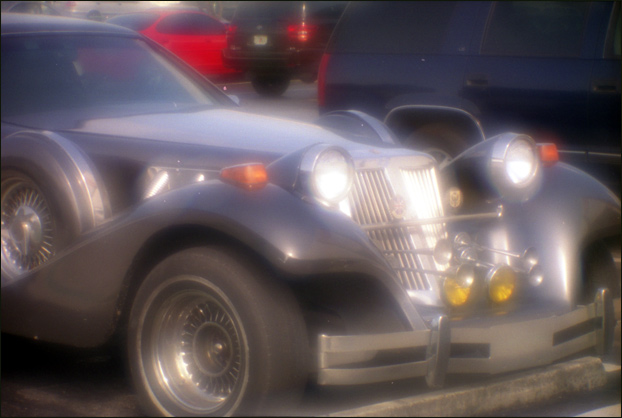
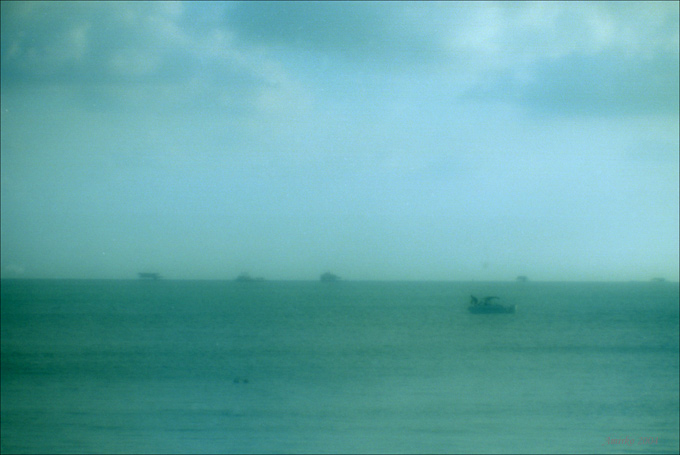
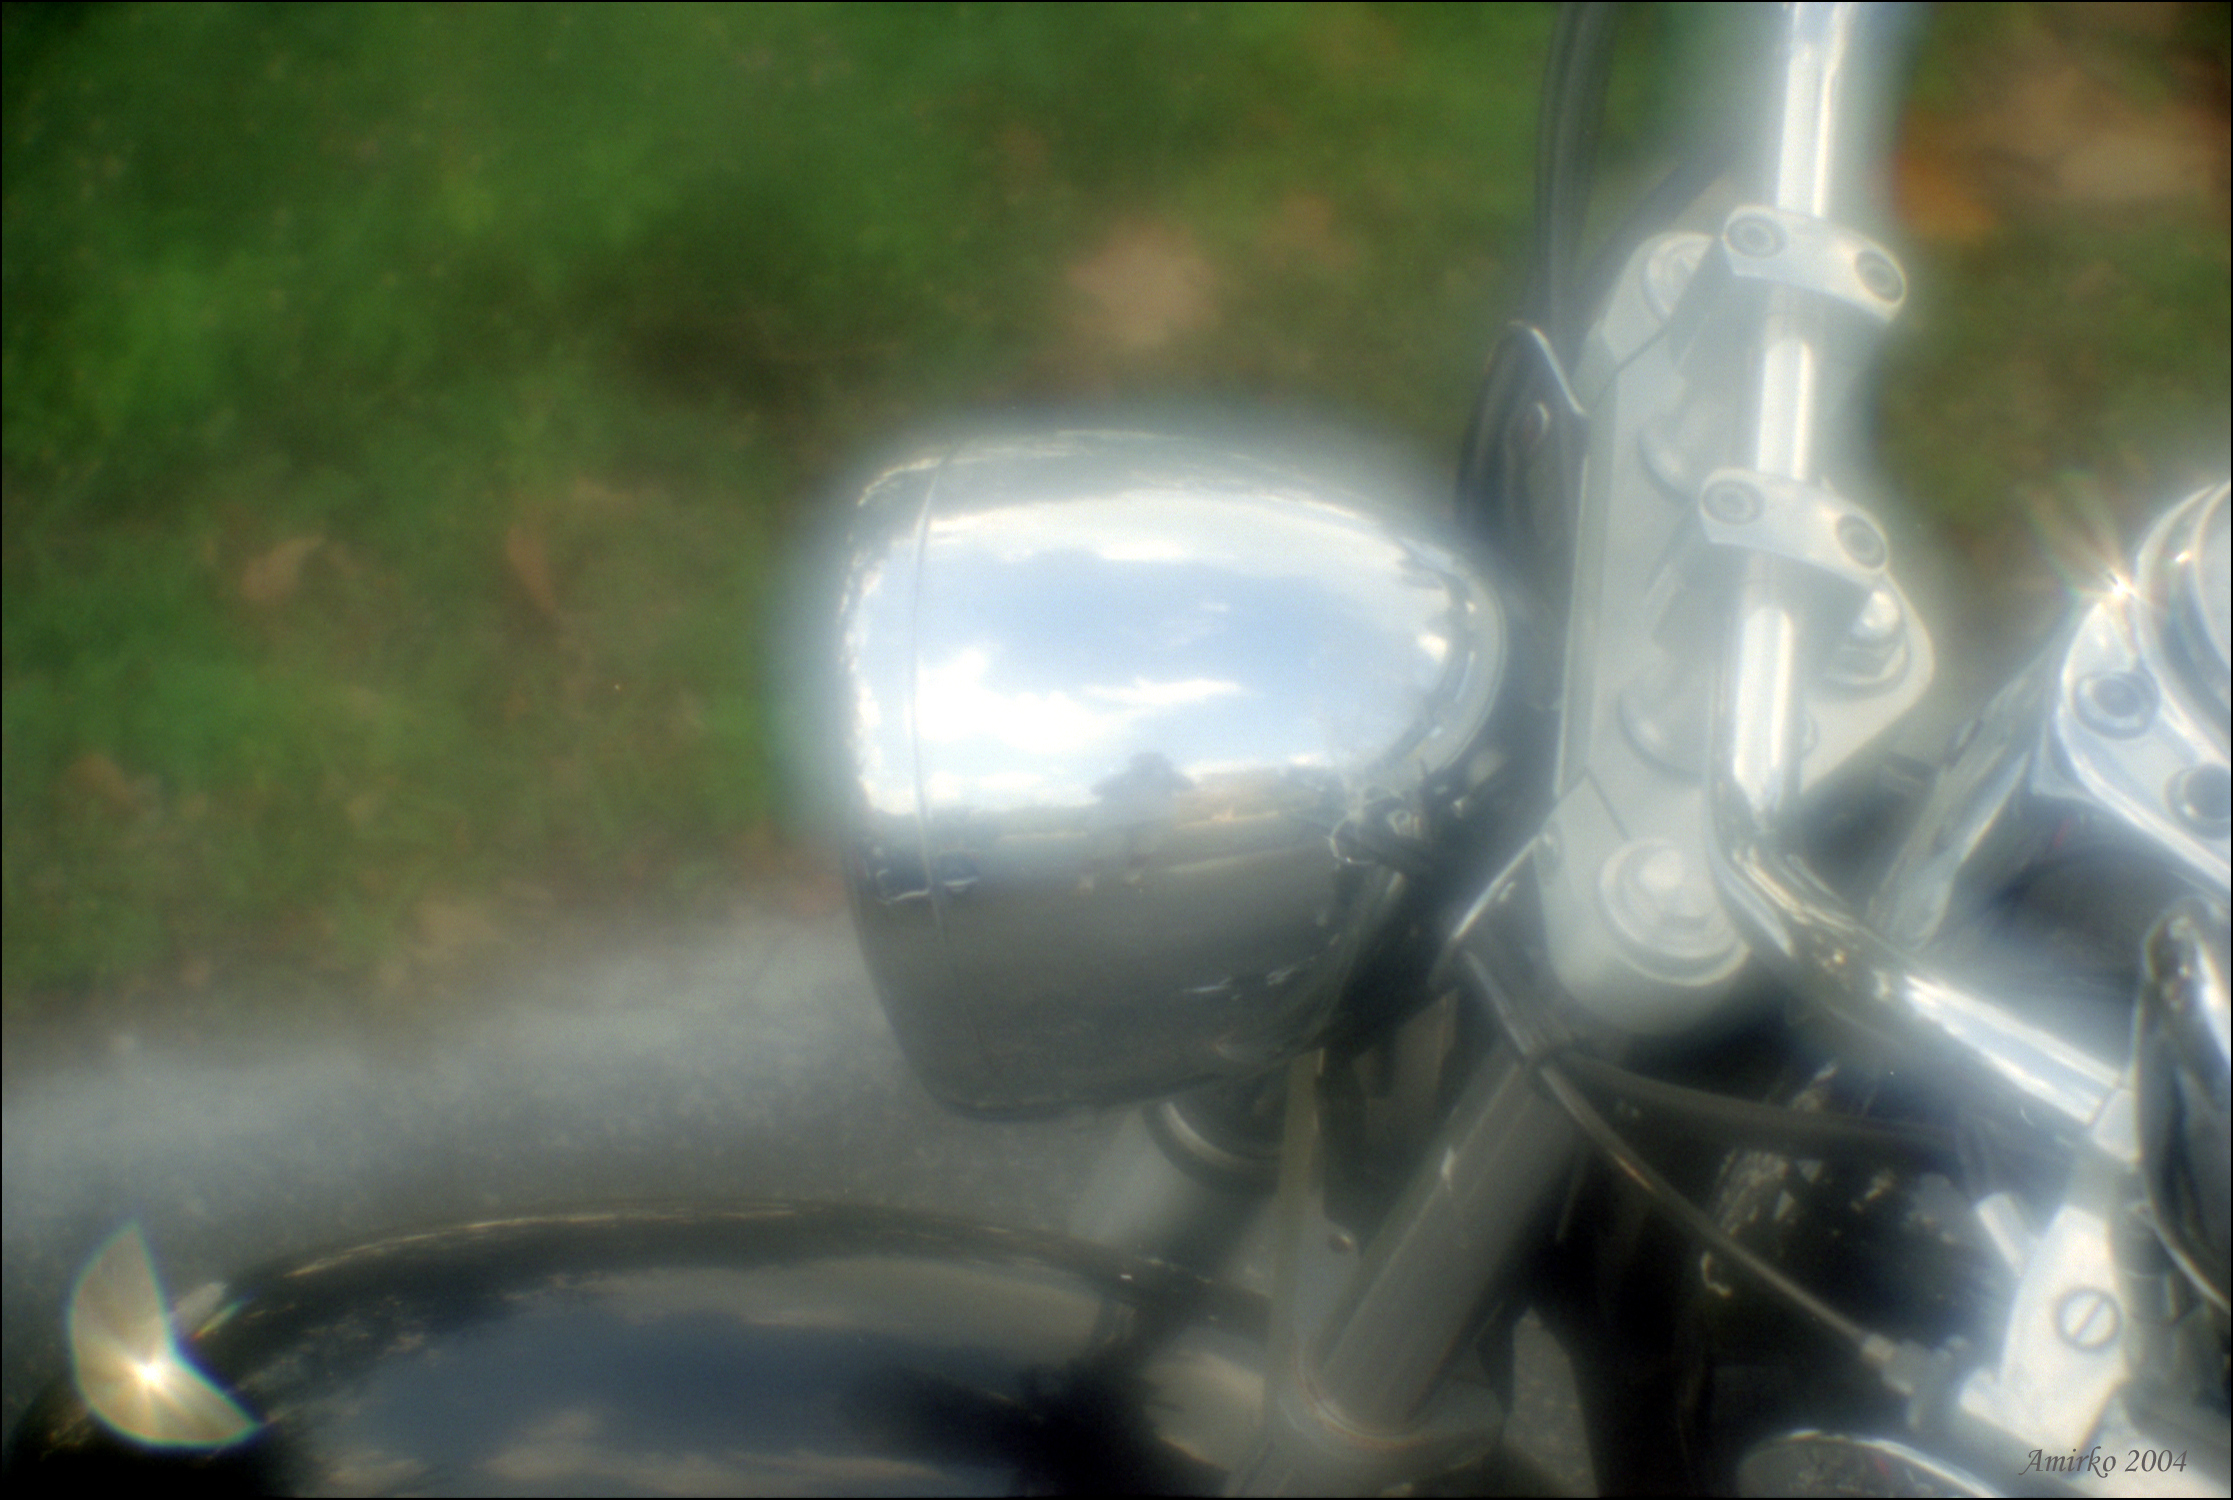
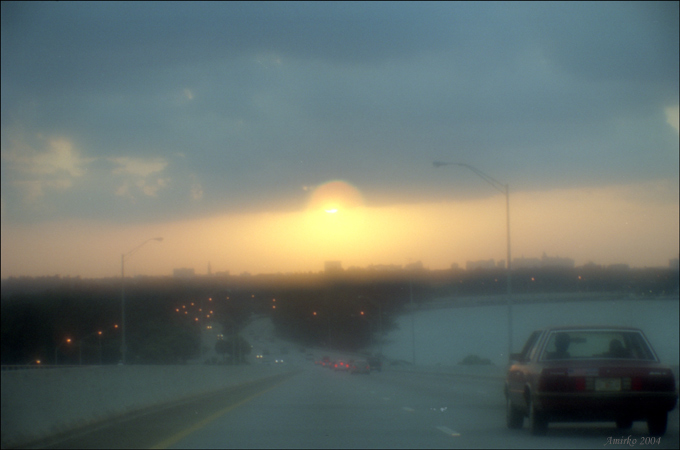
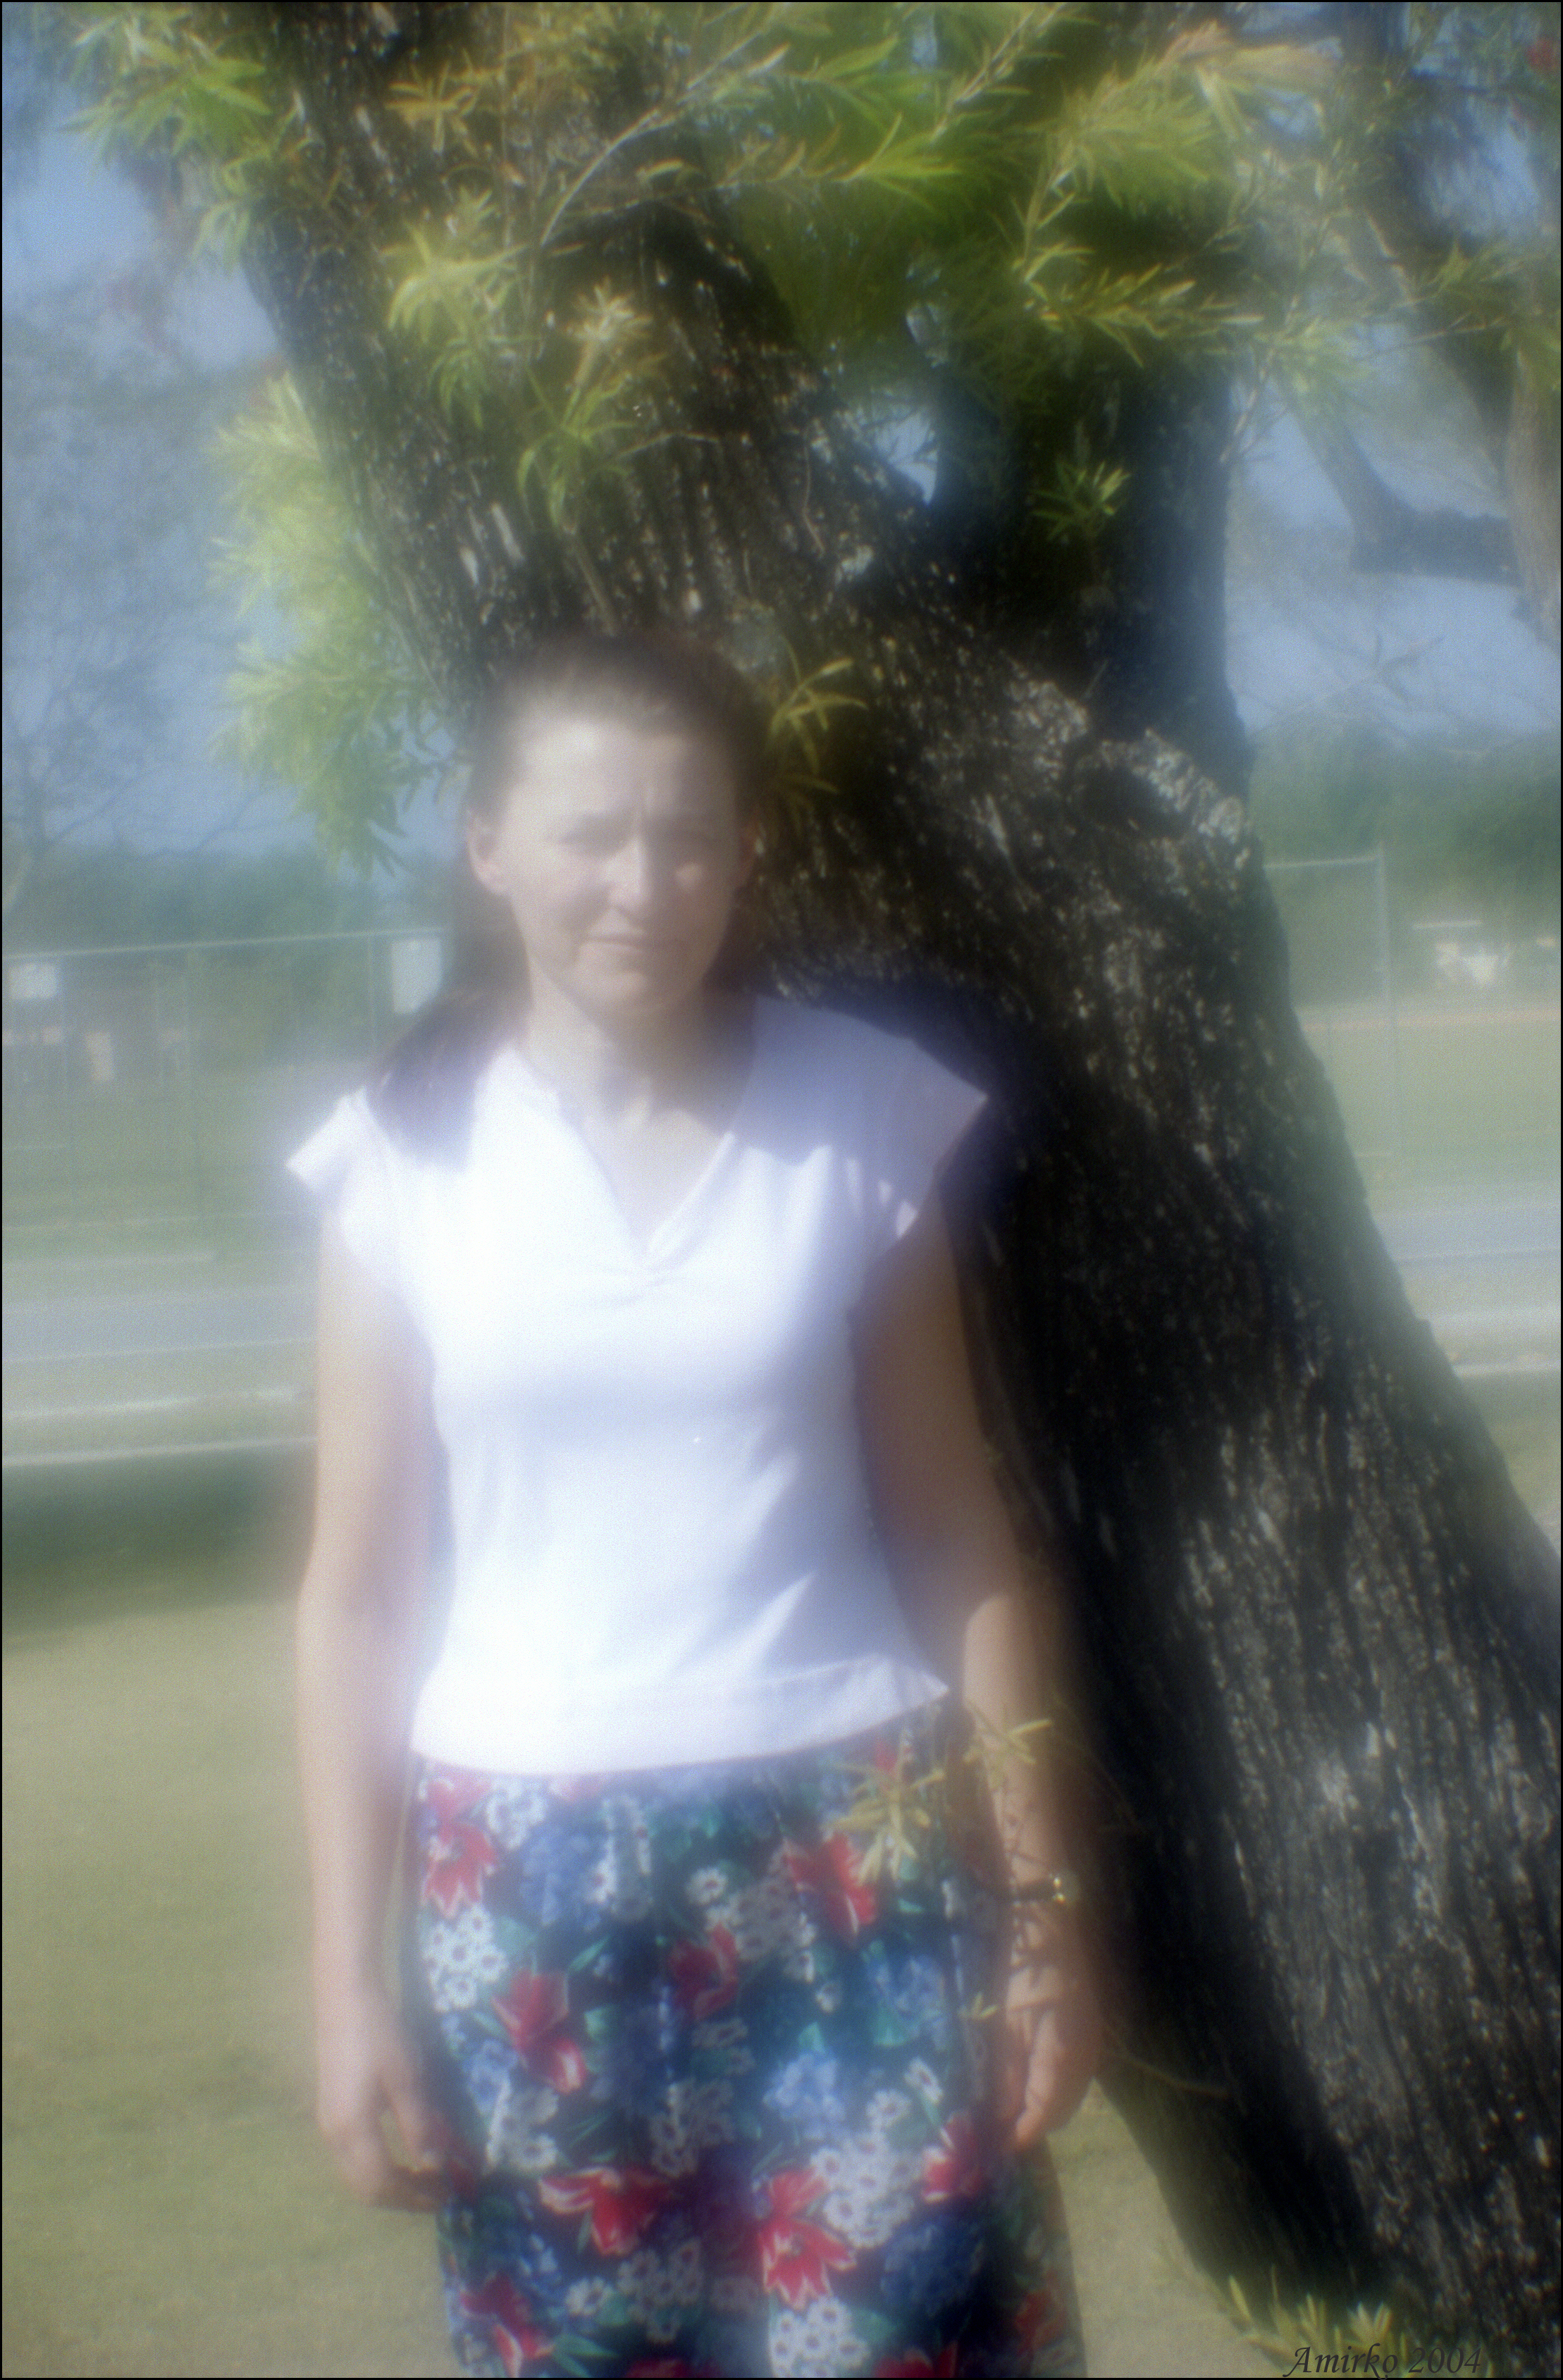
I shoot the pictures below with Minolta SRT MCII camera using Fuji Reala 100 film and aperture f/6.
The film was scanned on Epson Perfection 2400 with 1600 dpi and 2400 dpi resolution settings.
The result was processed in Photoshop CS, I changed levels and color balance. To see the screen-size copy,
click the icon on the left. To see the full image please click on the icon on the right.
The sizes of the original images are from 3 to 10 Meg.
The pictures above are all test shots from the first roll; do not try to judge them from the artistic point of view.
I just tried to choose the subjects suitable for the soft lens: bright object on dark background, sparks of
sun on the water, evening lights etc. As you can see, the soft effect is there. By the way, it is not so easy to focus the lens
besause of its low contrast. But you can see some sharp details on the pictures, - for example, tree trunk (#6),
boat on photo #3. Overall I am very pleased with the results and glad to have such a great instrument in my photo bag.
If you have any questions, please do not hesitate to send me a message:
emirco@emirco.net.
|