
|
|
|
| rus | |||||||||||||||||||||||||||
 | |||||||||||||||||||||||||||
|
This page is dedicated to the upgrade of old but famous Polaroid cameras.
The major problem with old rollfilm Polaroids is the film: it is not in production anymore.
As a result of the project we suppose to have a nice compact large format rangefinder camera.
The media (film) we will try to adopt the camera to, is Polaroid packfilm.
You may be surprised, but Polaroid's packfilm still available online and in local stores.
The types now are 664, 665, 667, 669, 690 and several others. The features of the film are unique. For example,
Polaroid 665 black and white film will give you both positive and negative; the negative has great resolution.
The other film types also worth trying: type 667 black and white - high speed (3200 ASA), 690 Polacolor - bright colors, and of course, the feature which is common for all Polaroid materials: it is self-developing, "instant" film.
The size of the actual media (3.25x4.25 inch or 7.2х9.5см) is big enough to save plenty of details even when using low resolution high speed and grainy Polaroid type 667.
The drawback is the price; one shot will cost you from 1 to 2 dollars.
But in large format world you are not suppose to shoot like crazy; so let us assume that the cost is ok for you (and me).
| |||||||||||||||||||||||||||
|
| |||||||||||||||||||||||||||
|
Polaroid 800 and other *roids.
Polaroid 800 and simular Polaroid 110A, 110B, 120, 150, 160 and some others have been in production from late 40th to early 60th of 20th century.
They all have the same classical folding-flatbed camera design.
All of them are manual bellows-based rangefinder cameras.
Front standard is moving on the reels, the focus adjustment disk is on the outer side, under the reels.
The bellows are good quality; focus is adjustable from 3 feet to infinity.
The body and reels, rangefinder, shutter and bellows - everything made very well, "build to last".
Polaroid 110A, 110B, 120 cameras are different from 150/160/800/etc line. They have very good 4-element coated lens. It could be Rodenstock Yasarex, Wollensak Raptar, Ennit or Yashika Yashinon, all 127mm focal length. You can get more info on the lenses in [1]. 110/A/B/120 have good old mechanical leaf shutters (usual for LF "shutter-in-the-lens" design), speeds in 1-1/300 or 1-1/400 range, plus Bulb. They also have self-timer and flash synch port (M,X). As I mentioned above, the film for all the cameras are not available; that is why they are so cheap. You can buy Polaroid 150, 160 or 800 for a fracture of original price, sometimes just for shipping and handling. Polaroid 110A/B/120 series a bit more expensive; but you should be able to find one for $60-$160 on E-bay (shipping not included). All the cameras can be used with modern film after some work; the idea is to get rid of old fixed rollfilm back and fasten to the camera a new modern film back. The back could be 120 medium format rollfilm, or 4x5 sheet film, or Polaroid packfilm. It is possible to use the cameras "as is" though. Just open the back in complete darkness, put the 4x5 sheet in (it will just fit) and close the back. Take camera in the field and make an exposure. Then again, open the camera in the darkroom, take the film out and develop it. I do not like the idea, so I decided to go with Polaroid packfilm. We will try to fasten the Polaroid packfilm back to the camera. The back is from "donor" camera (see below). Polaroid Minute Maker and simular *roids. There is a breed of newer rigid Polaroid cameras made of cheap plastic, with cheap plastic lenses. They are simple creatures, all auto, nothing special. The good news is:
| |||||||||||||||||||||||||||
|
| |||||||||||||||||||||||||||
|
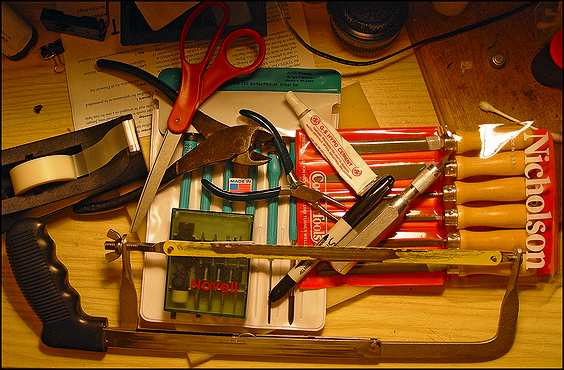
Tools. The tools are a good set of small screw drivers, soldering iron, scissors, hacksaw, knife, set of files, cutting pliers, pliers, epoxy glue (JB Weld) and rubber cement glue: | |||||||||||||||||||||||||||
| |||||||||||||||||||||||||||
|
The detailed list of tools along with safety precautions can be also found here.
Disassembling steps.
We will start our work from partial disassembling the base camera.
Put it on the desk, back side up, open the back and try to disassemble as many details as possible.
Check here for the additional info. Do not dump the parts though; we can use some of them later.
| |||||||||||||||||||||||||||
| |||||||||||||||||||||||||||
|
Now, please take a look at the right side (right side if you looking at the camera from the back). There is a sofisticated cutting mechanism here; with packfilm there is no need for it. To take if off, 4 screws have to be unscrewed. Two are visible on the sides and two are covered by leatherette: | |||||||||||||||||||||||||||
| |||||||||||||||||||||||||||
|
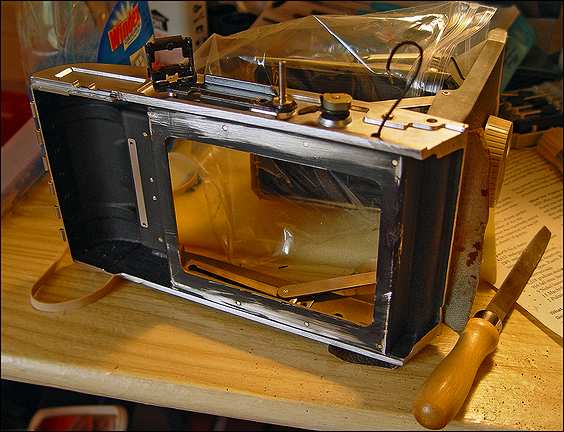
It is going to be a lot of filings in the air; so my recommendation is to make protection cover on the rangefinder, take off the bellows and cover the lens and the front standard (in my project I disassembled the rangefinder and I would not recommend it -- unless you like spending time adjusting rangefinder): | |||||||||||||||||||||||||||
| |||||||||||||||||||||||||||
|
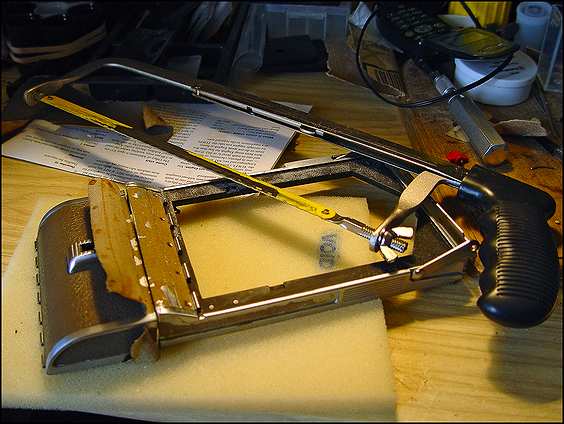
Saw Sura, saw... If you never tried to cut a piece of metal with a hacksaw, now it is a right time to start!
It would be great to use some kind of clamp or grip vice to fix the camera when filing and sawing.
The task now is to cut the packfilm back from donor camera (mine was Polaroid Minute Maker).
The detailed directions on cutting and filing the donor camera back can be found on the page.
| |||||||||||||||||||||||||||
| |||||||||||||||||||||||||||
|
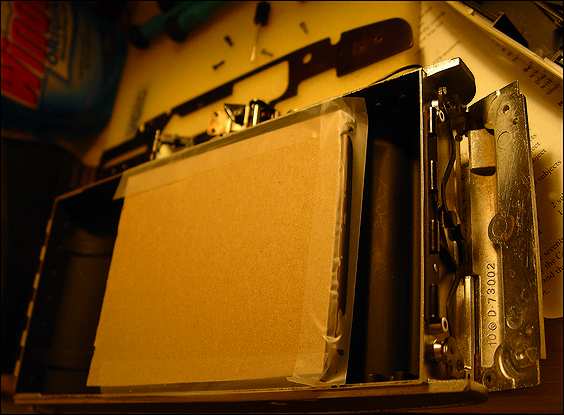
You can see that I did not cut the leatherette; your can glue it back to make the result look and feel prettier. Now try to file down all the details around the film window, they could obstruct the film from reaching the camera's film plane (please check how it is suppose to be on the photo above). Now we can glue the leatherette back (if you need more leatherette, you have plenty of it on the (former) back door. Open rangefinder, clean it from filings and dust with compressed air, clean and install the bellows. It is almost ready. | |||||||||||||||||||||||||||
|
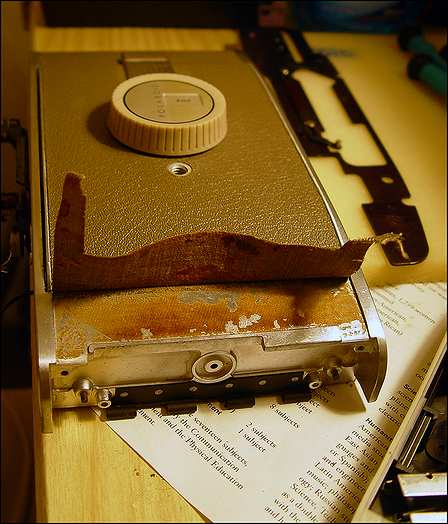
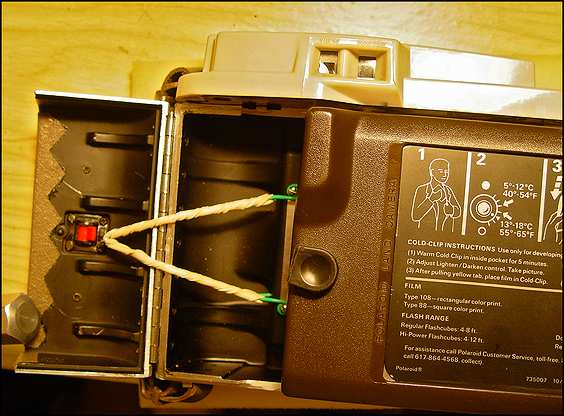
Final steps.Now we have to find the way how to fasten the film back to the camera. The easiest one is to glue it with dark epoxy glue. That is what I did with JB Weld glue. The better way is to use screw-on connection; it is up to you. After this step we have the camera, it is a bit ugly and the rangefinder is not coupled as it should, but it is working. Fist, we will make it look prettier. Let us create the small door for the opening on the left back side of the camera. You can use the former back door as a starting point: | |||||||||||||||||||||||||||
| |||||||||||||||||||||||||||
|
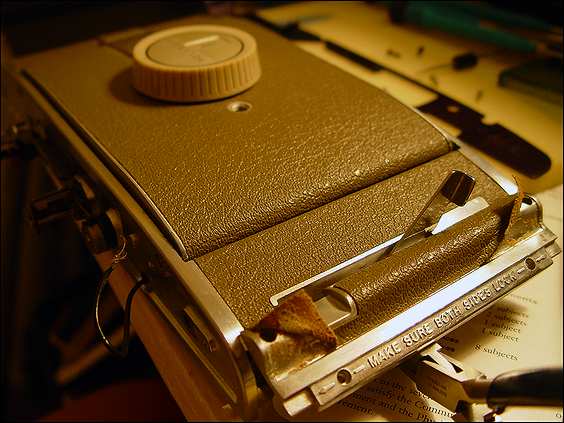
Please see how it is suppose to be: | |||||||||||||||||||||||||||
| |||||||||||||||||||||||||||
|
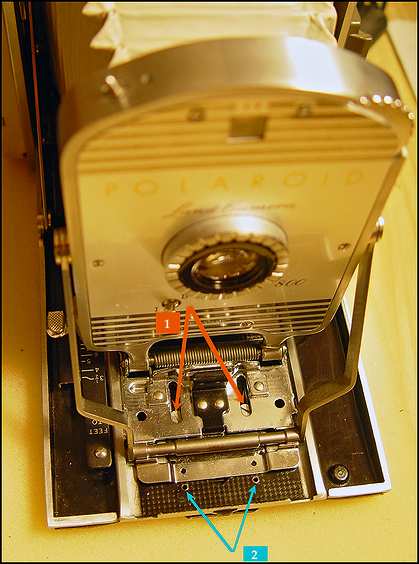
The next step is to reset the infinity point; the distance between the film and the lens has been changed so we have to find the new infinity position for the front standard for the rangefinder to be operational and coupled with the lens. Take a look at the photo below: | |||||||||||||||||||||||||||
| |||||||||||||||||||||||||||
|
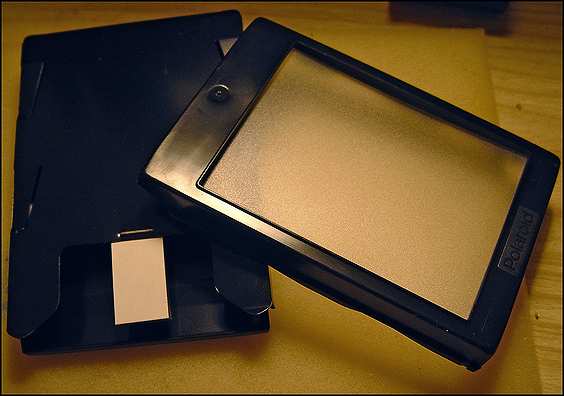
As you can see, it is an easy task if you cut two rivets (2, blue arrows, on the photo the rivets are already taken away) and weaken two screws (1, red arrows). Now we need a ground glass to control the infinity focus. The simplest way is to use a piece of tracing paper/matte plastic/real ground glass and an empty pack of Polaroid packfilm. Put the ground glass in the pack, fix it with couple of pieces of masking tape, and you have done: | |||||||||||||||||||||||||||
| |||||||||||||||||||||||||||
|
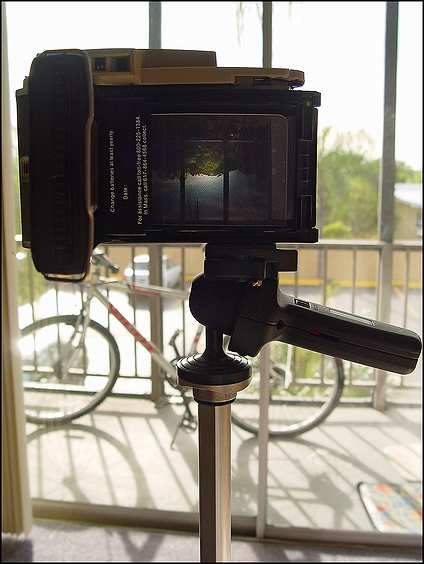
Now install camera on tripod and try to get on the ground glass sharp image of any distant (more than 100 feet) object. Move front standard back and forth to change the focal distance. You can use a loupe for precise focusing. As soon as you get the image sharp, fix two screws and check the focus after this: | |||||||||||||||||||||||||||
| |||||||||||||||||||||||||||
|
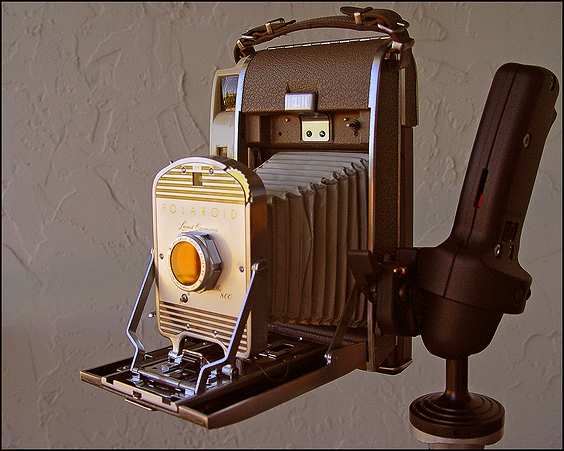
Well, it is ready to shoot. Please see the final view (pictured with orange filter on the lens): | |||||||||||||||||||||||||||
| |||||||||||||||||||||||||||
|
Final advice: cover with dull black paint all the shining details inside camera, clean the camera thoroughly, clean the lens and wipe developing rollers. I lost several shots because of tiny plastic filings I found later in the rollers.
| |||||||||||||||||||||||||||